A cabinet panel can leave the workshop with accurate dimensions, clean drilling and the correct material, yet still cause problems during installation because nobody clearly specified the edging.
Perhaps the visible edge received the wrong thickness. The selected colour does not match the board. A concealed edge was unnecessarily finished, while an exposed edge was missed. In another case, the final panel size changed because the cutting list did not clarify whether the dimensions included the edge banding.
These may look like small details on a drawing, but they affect appearance, durability, assembly and installation.
For cabinetmakers, builders, carpenters and shopfitters ordering cut-to-size panels in Melbourne, edge banding should never become a decision made after production starts. You need to identify the edge material, thickness, colour and application for every relevant panel before cutting and edging begin.
This guide explains the main edge-banding options, where different thicknesses work, how to specify edges on a cutting list and what information to send when requesting cabinet edge banding Melbourne services.
What Is Edge Banding?
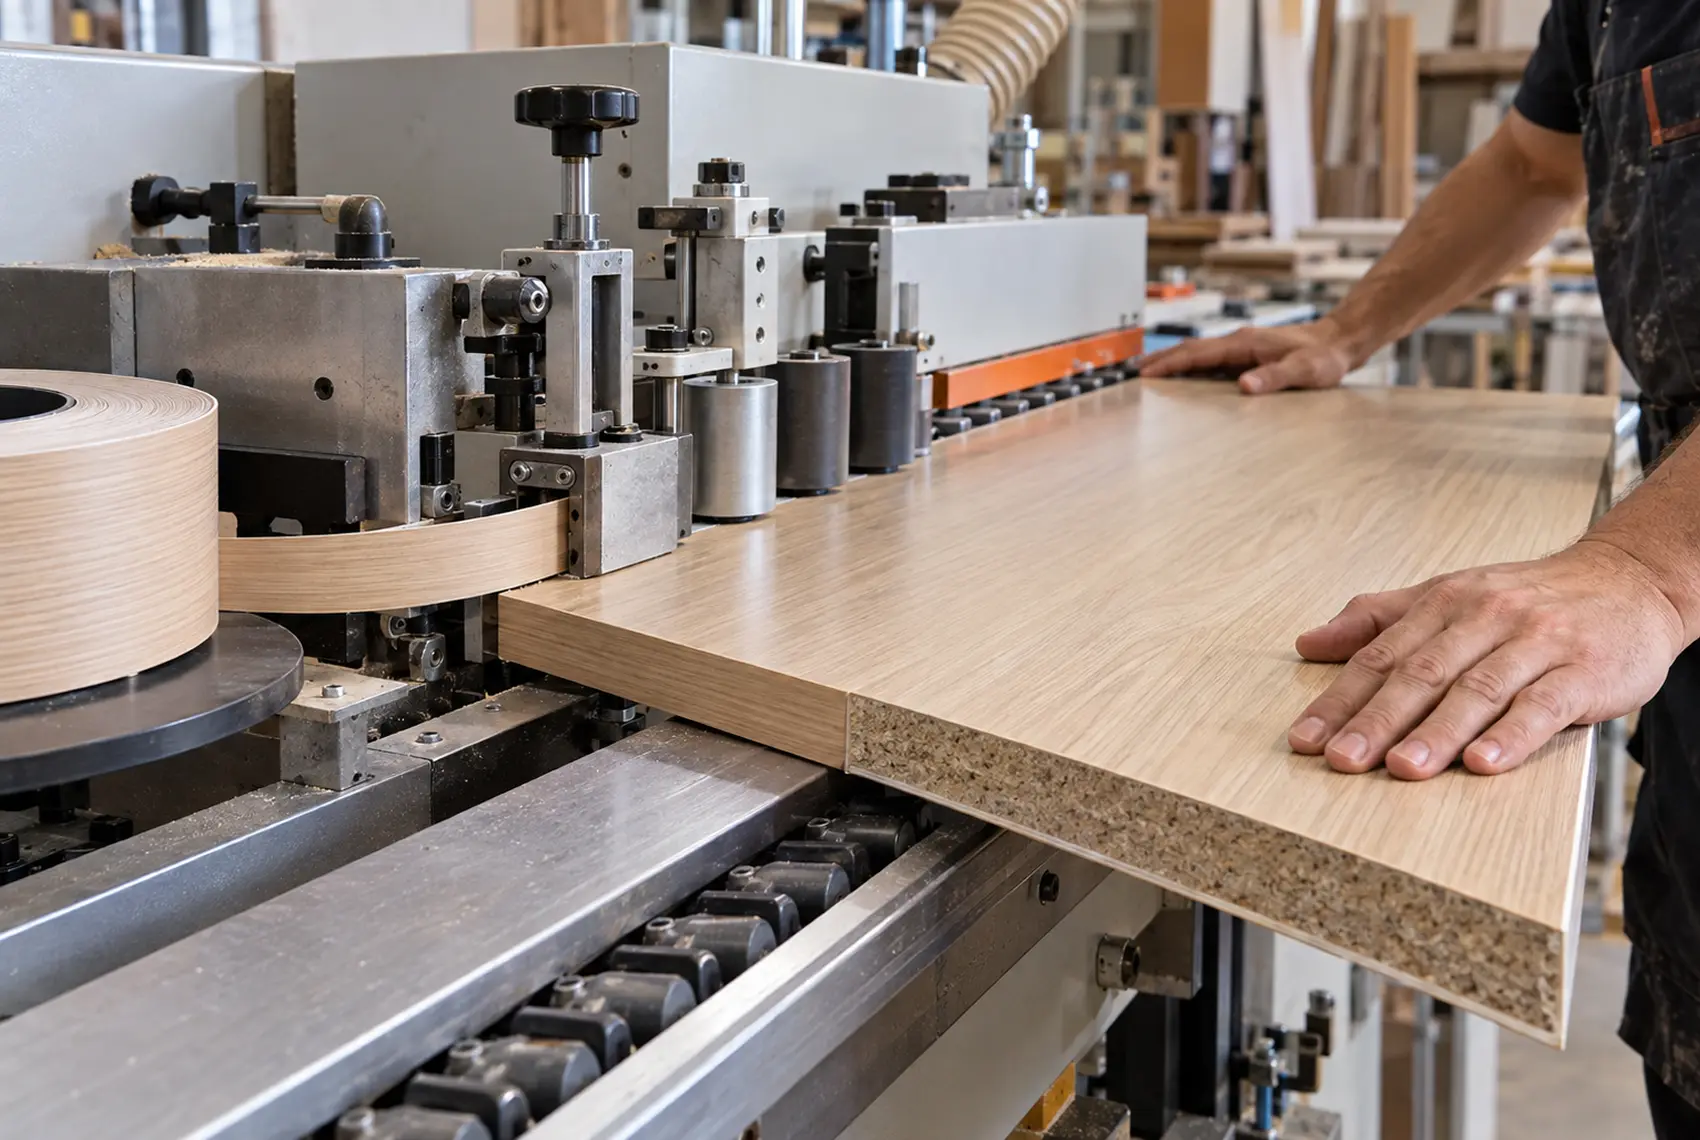
Manufacturers produce many cabinet panels by applying a decorative surface to a board substrate. When the panel is cut, its exposed edge reveals the internal board. Edge banding covers that raw edge with a separate strip of material.
A properly selected and applied edge can:
- Create a clean, finished appearance
- Coordinate the panel edge with its face
- Protect the exposed substrate from everyday contact
- Reduce chipping and surface damage along vulnerable edges
- Make shelves, doors, end panels and cabinet components easier to clean
- Improve consistency across assembled cabinetry
- Provide a thicker, more durable edge where a project requires it
Edge banding does not make a cabinet panel waterproof. If a panel sits near a sink, dishwasher, basin or another moisture-prone area, the complete cabinet design must manage water exposure, joins, penetrations, ventilation and installation conditions.
Start with the Panel’s Job, Not Just Its Colour
A matching colour may look right on a sample, but colour alone does not determine the correct edge.
Before selecting edge banding, consider how the panel will function after installation. A shelf edge that people touch every day has different requirements from an internal cabinet divider. A shop counter may experience more frequent impact than a wardrobe shelf. A kitchen door needs a refined finish on every visible side, while a cabinet component fixed between two panels may have no exposed edges.
Ask the following questions:
- Will the edge remain visible after installation?
- Will people regularly touch, lean against or clean it?
- Is the panel part of a door, shelf, drawer front, end panel or carcass?
- Will the panel sit near heat, steam or occasional splashes?
- Does the design require a seamless colour match or a contrasting feature?
- Will the installer cut or scribe the panel on site?
- Does the project need a square edge or a more rounded profile?
- Which edges will connect to other panels?
- Which surface represents the finished face?
- Does the drawing show the panel’s orientation clearly?
These questions help determine where edging is required and which specification suits the application.
Common Edge-Banding Materials
The available materials, colours and thicknesses vary between board ranges and suppliers. Confirm availability before finalising drawings, client selections or cutting lists.
ABS Edge Banding
ABS is widely used for residential and commercial cabinetry. Manufacturers offer it in many solid colours, timber patterns, textures and thicknesses to coordinate with decorative boards.
It may suit:
- Kitchen cabinetry
- Wardrobes
- Vanities
- Laundries
- Office joinery
- Retail fixtures
- Shelving
- Doors and drawer fronts
- Visible carcass edges
A quality colour match can make the edge blend closely with the panel face. A contrasting ABS edge can also become an intentional design detail.
PVC Edge Banding
PVC edging is another commonly recognised cabinet-edge product. It comes in different colours, patterns and thicknesses and may be used across residential and commercial applications.
Specifications, environmental requirements and supplier availability can influence whether ABS, PVC or another product suits a particular project. Do not treat the material names as interchangeable without checking the nominated board and project requirements.
Melamine Edge Tape
Melamine edging provides a thin and economical finish for selected cabinet components. It often works best on lower-contact or less prominent edges where the project does not require a heavy-duty edge.
Possible applications include:
- Internal shelves
- Concealed cabinet components
- Internal dividers
- Low-contact storage areas
- Budget-sensitive cabinetry
Because it is relatively thin, it does not create the same substantial finished edge as thicker ABS or PVC options.
Timber Veneer Edging
Timber veneer edging can coordinate with veneered panels and natural timber finishes. It requires careful grain, colour and coating consideration because timber products naturally vary.
A specification should identify:
- Timber species
- Veneer cut or appearance
- Grain direction
- Edge thickness
- Required sanding
- Stain or coating system
- Whether the edge must match adjacent components
The finishing process plays an important role in the final appearance. Confirm who will sand, coat and finish the edged components.
Feature and Contrasting Edges
Not every edge needs to disappear. Some designs use contrasting edges to introduce a deliberate visual line.
For example, a project may combine:
- A light-coloured panel with a dark edge
- A solid colour with a timber-look edge
- Matching carcasses with contrasting shelves
- A bold feature edge on retail or educational joinery
A contrasting edge makes alignment and workmanship more visible, so drawings and manufacturing details need to be especially clear.
Which Edge-Banding Thickness Should You Choose?
No single thickness suits every cabinet component. Thicker does not automatically mean better, and thinner does not automatically mean lower quality. The correct choice depends on appearance, handling, exposure and the nominated board system.
The measurements below represent common specification categories. Actual product ranges and finished dimensions must be confirmed with the manufacturer or cut and edge service Melbourne provider.
| Edge thickness | Typical characteristics | Possible applications |
|---|---|---|
| Approximately 0.4–0.6 mm | Fine, economical and visually subtle | Internal shelves, concealed carcass edges and low-contact components |
| Approximately 1 mm | Balanced appearance and everyday protection | Cabinet components, shelves, doors and general joinery |
| Approximately 2 mm | More substantial edge with stronger impact resistance | Doors, drawer fronts, desk edges, commercial joinery and exposed shelves |
| 3 mm or specialised edges | Heavy or highly visible edge treatment | Selected commercial, educational, retail or feature applications |
Thin Edging
Thin edging can create a neat finish without making the panel edge visually prominent. It may suit internal components and areas with limited direct contact.
However, thin tape may not provide the appearance or impact tolerance required for exposed doors, counters or frequently handled shelves.
One-Millimetre Edging
Approximately 1 mm edging often provides a practical balance between appearance, cost and everyday performance. It can suit many general cabinetry applications, subject to the selected board, edge product and project specification.
The final decision should still account for where the edge sits and how people will use it.
Two-Millimetre Edging
Approximately 2 mm edging creates a more noticeable and substantial panel edge. It may suit high-contact areas such as doors, drawer fronts, work surfaces, exposed shelves and commercial cabinetry.
The increased thickness can also affect the finished appearance, corner detail and panel dimensions. The drawings should show where the thicker edge applies instead of leaving the manufacturer to assume.
Matching Edges Versus Contrasting Edges
Most cabinetry projects use an edge colour selected to coordinate with the board face. Matching the product code is the safest starting point, but a matching name does not always guarantee an invisible transition.
Differences can occur because of:
- Texture
- Gloss level
- Pattern scale
- Timber-grain direction
- Production batches
- Edge thickness
- Lighting
- Viewing angle
Review physical samples whenever the match is visually important. Screens, digital swatches and printed schedules may not show the exact colour or texture.
Contrasting edges should also be selected deliberately. Specify the exact edge code instead of writing “black edge,” “timber edge” or “matching dark edge.” General descriptions leave too much room for interpretation.
Choosing Edge Banding for Different Applications
Kitchen Cabinets
Kitchen cabinetry includes doors, drawer fronts, shelves, appliance panels, island panels and cabinet components. Each part experiences different levels of handling.
Frequently touched and visible edges generally need greater attention than concealed internal components. Areas near sinks and dishwashers also require careful cabinet design because edging alone cannot prevent damage caused by ongoing leaks, steam or standing water.
For a kitchen project, review:
- Door and drawer-front edges
- Exposed shelf fronts
- Island end panels
- Dishwasher and sink-adjacent panels
- Pantry shelves
- Microwave and oven surrounds
- Applied panels
- Filler panels that may require site scribing
Wardrobes and Storage Cabinetry
Wardrobe shelves, drawer units and vertical dividers may use a combination of visible and concealed edges.
The front edges of adjustable shelves remain visible and receive regular contact. Fixed edges housed between panels may not require the same treatment. Sliding-door systems and exposed end panels require separate consideration.
Office and Commercial Joinery
Office desks, counters, storage units and shared work surfaces often experience regular use. Thicker edging may suit exposed and high-contact areas, while internal storage components may use a finer edge.
Commercial specifications should also address consistency across repeated units, replacement requirements and approved product codes.
Retail and Shopfitting Projects
Retail joinery may combine heavy use with prominent visual detailing. Customers can see and touch display edges, counters, shelves and point-of-sale units throughout the day.
Shopfitters should identify:
- Customer-facing edges
- High-contact counter edges
- Feature edges
- Removable panels
- Service-access panels
- Edges near floor-cleaning zones
- Components that installers may adjust on site
A well-prepared CNC cutting and edging Melbourne order should separate functional edging from decorative edging and clearly identify both.
How Edge Banding Affects Finished Panel Dimensions
This is one of the most important details to confirm before production.
A cutting list may show either:
- The required finished panel size after edging, or
- The raw board size before edge banding.
If the list does not state which method it uses, the finished component may become larger or smaller than intended.
For example, imagine a shelf requires a finished width of 600 mm with edging on both ends. The production information must explain whether 600 mm represents the finished dimension or the raw panel width.
A clear note might state:
- All dimensions are finished sizes unless noted otherwise.
Alternatively:
- Cutting-list dimensions show raw board sizes before edging.
Use one system consistently throughout the job. Mixing raw and finished dimensions within the same list increases the chance of errors.
How to Mark Edges on a Cutting List
A panel description such as “edge all visible sides” may sound clear to the person who designed the cabinet, but it can become ambiguous when the manufacturer views the component separately.
A better cutting list identifies each edge using a consistent system.
You might label the sides as:
- Top
- Bottom
- Left
- Right
Alternatively, a production drawing may use numbered edges:
- Edge 1
- Edge 2
- Edge 3
- Edge 4
The cutting list should then state the product required on each relevant edge.
| Part | Finished size | Material | Grain | Top | Bottom | Left | Right |
|---|---|---|---|---|---|---|---|
| Shelf 01 | 800 × 400 mm | Board code | Across length | 1 mm matching | None | None | None |
| Door 02 | 720 × 450 mm | Board code | Vertical | 2 mm matching | 2 mm matching | 2 mm matching | 2 mm matching |
| End panel 03 | 2400 × 600 mm | Board code | Vertical | 1 mm matching | None | 1 mm matching | None |
This table is only an example. Use the naming and orientation system accepted by the chosen production provider.
Grain Direction and Panel Orientation
Timber-look and patterned boards require clear grain direction. Without it, two correctly cut panels can still look wrong when assembled.
The cutting list or drawing should show:
- Which dimension follows the grain
- Which side is the visible face
- Whether adjacent panels require grain continuity
- Whether doors form a matched sequence
- Whether a left-hand and right-hand component are mirrored
- Where the exposed edge sits after installation
An arrow on a drawing can help, but the written schedule should also confirm orientation. This becomes particularly important when panels include both edging and CNC drilling.
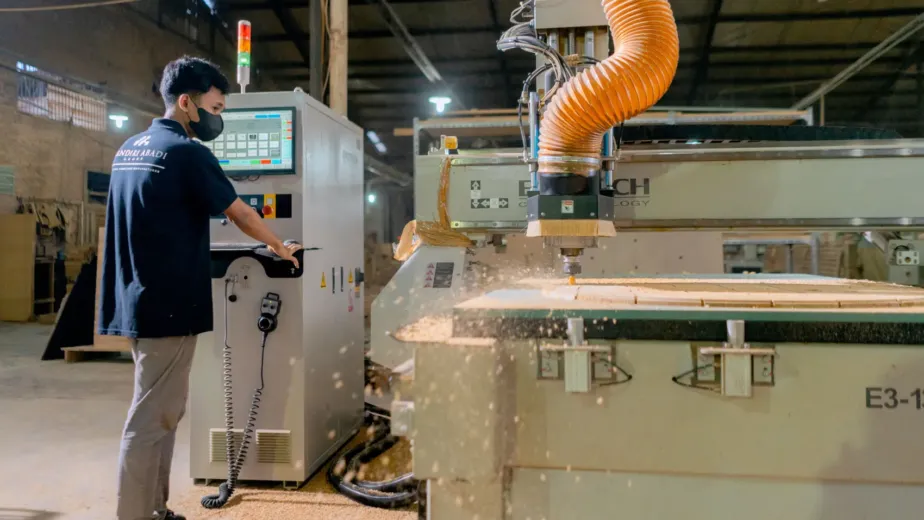
How CNC Cutting and Edge Banding Work Together
A coordinated production process can include panel cutting, edging and machining. The order of operations depends on the component, machinery, edge specification and required drilling.
The production information may need to cover:
- Final panel dimensions
- Edge thickness
- Edge colour and product code
- Grain direction
- Hinge drilling
- Shelf-pin drilling
- Connector drilling
- Grooves or rebates
- Panel orientation
- Part labels
- Cabinet or room references
Accurate machinery cannot correct an unclear specification. A CNC cutting and edging Melbourne supplier can manufacture repeatable components, but the source information must clearly show what the project requires.
Common Edge-Banding Mistakes
Specifying “Matching Edge” Without a Product Code
A board may have several possible edge matches. Provide the nominated manufacturer, colour and edge code whenever possible.
Forgetting Concealed Construction Details
Some edges may appear concealed in an elevation but remain visible when a door opens or a shelf is removed. Review the assembled cabinet rather than only the front view.
Edging Every Side Without Checking the Assembly
Unnecessary edging can increase cost and may affect how components join. Identify the edges that genuinely require finishing.
Missing an Exposed Edge
A missed edge becomes obvious during assembly or installation. Front shelf edges, open cabinet sides and filler panels deserve particular attention.
Mixing Edge Thicknesses Without Labelling Them
If doors require 2 mm edging and carcass components require 1 mm edging, show this clearly in the schedule.
Ignoring Grain Direction
A panel can have the correct edge on the correct side and still look wrong because the grain runs in the wrong direction.
Using Unclear Finished Dimensions
State whether measurements represent the finished or raw panel size. Apply the same convention across the complete order.
Changing Materials After Drawings Are Approved
A replacement board may use a different thickness, colour match, texture or available edge range. Review the cutting list and edge specification when the board selection changes.
Assuming Edge Banding Makes the Panel Waterproof
Edge banding improves the finish and protects a raw edge during normal use, but it does not make the complete cabinet waterproof. Leaks, unsealed penetrations and unsuitable installation conditions still require attention.
Information to Send for a Cut-and-Edge Quote
A detailed enquiry helps a cut and edge service Melbourne provider understand the job and identify missing information before production.
Include:
Project details
- Project name
- Business or contact name
- Melbourne delivery or collection location
- Required completion date
- Trade, residential or commercial project type
- Whether the order is a one-off or repeat project
Panel information
- Board manufacturer
- Product range
- Colour or décor name
- Product code
- Board thickness
- Sheet quantity or panel quantity
- Required finished dimensions
- Grain direction
- Visible face
- Part names and quantities
Edge information
- Edge material
- Edge product code
- Edge thickness
- Edge colour
- Which sides require edging
- Matching or contrasting finish
- Any special corner or profile requirements
Machining information
- Hinge drilling
- Shelf-pin holes
- Connector holes
- Drawer-runner drilling
- Grooves or rebates
- Cut-outs
- Reference edges
- Drilling depths
- Left-hand and right-hand components
Supply and delivery information
- Material supplied by the client or manufacturer
- Labelling requirements
- Packaging requirements
- Collection or delivery
- Delivery postcode
- Site-access restrictions
- Order sequencing requirements
Attach drawings, schedules and cutting lists that use the same part names. Inconsistent names across different documents make checking and production more difficult.
Edge-Banding Order Checklist
Before approving the order, confirm that you have:
- Selected the correct board and thickness
- Confirmed edge-product availability
- Identified the edge material and thickness
- Added the exact edge colour or product code
- Marked every edge that requires banding
- Checked visible and concealed cabinet edges
- Confirmed whether dimensions are raw or finished
- Shown the grain direction
- Identified the visible face
- Checked left-hand and right-hand components
- Coordinated edge details with CNC drilling
- Reviewed filler and scribe panels
- Checked panels that installers may trim on site
- Used consistent component names
- Added quantities and revision numbers
- Confirmed collection or delivery requirements
- Reviewed the final cutting list before production
Planning Cut-to-Size Panels with Sagar Cabinets
Sagar Cabinets provides cut-to-size panels Melbourne builders, cabinetmakers, carpenters, shopfitters and experienced renovators can order for residential and commercial joinery projects.
The service can include precision CNC cutting, edge banding and material supply based on the approved project information. Preparing a clear cutting list allows the production team to understand panel sizes, materials, edge requirements and machining details before manufacturing begins.
Sagar Cabinets operates from Dandenong South and supports trade projects across Melbourne. Available materials, edge products, thicknesses and production requirements should be confirmed for each job.
Send the Details Before the Panels Reach Production
The best time to resolve an edge detail is before the first panel is cut.
If you are preparing a cut-to-size order, send Sagar Cabinets your cutting list, material specifications, edge codes, drawings, quantities and machining requirements. The team can review the submitted information and discuss the next step for your Melbourne project.
Frequently Asked Questions
What is the best edge banding for cabinet panels?
- The best option depends on where the panel will be used, how visible the edge will remain and how much contact it will receive. Thin edging may suit internal components, while 1 mm or 2 mm edging may suit more visible or frequently handled areas. Confirm the product range and application with the panel and edge supplier.
Is 1 mm or 2 mm edge banding better?
- Neither thickness is automatically better for every component. Approximately 1 mm edging can provide a balanced finish for general cabinetry, while approximately 2 mm edging may suit doors, drawer fronts, exposed shelves and higher-contact applications. The visual design and project specification should guide the decision.
Does edge banding make cabinet panels waterproof?
- No. Edge banding covers and protects a raw panel edge during normal use, but it does not make the complete component waterproof. Cabinet design, joins, penetrations, installation and ongoing moisture exposure still need appropriate management.
Which cabinet panel edges need banding?
- Edges that remain visible or exposed after assembly usually require banding. Internal edges may also require it depending on the cabinet design and specification. Review each component in its installed position rather than assuming every concealed-looking edge will remain hidden.
Should cutting-list dimensions include edge banding?
- A cutting list may show finished dimensions or raw panel dimensions, but it must clearly identify which method it uses. Apply the same convention throughout the order so the manufacturer can calculate the correct component sizes.
Can edge banding match the panel colour?
- Manufacturers offer matching or coordinating edges for many decorative boards. However, slight differences in colour, texture, gloss or pattern may remain. Check physical samples when the match is visually important.
What information does a cut-and-edge supplier need?
- Provide the board manufacturer, product code, thickness, panel dimensions, quantities, grain direction, edge material, edge thickness, edge code and the sides requiring edging. Include any CNC drilling, grooves, cut-outs, labelling, packaging and delivery requirements.
Can cut-to-size panels arrive ready for assembly?
- Panels may be supplied cut, edged and machined according to the approved production information and available service. Confirm whether the order includes hardware drilling, grooves, labelling, packaging and other assembly requirements before production.