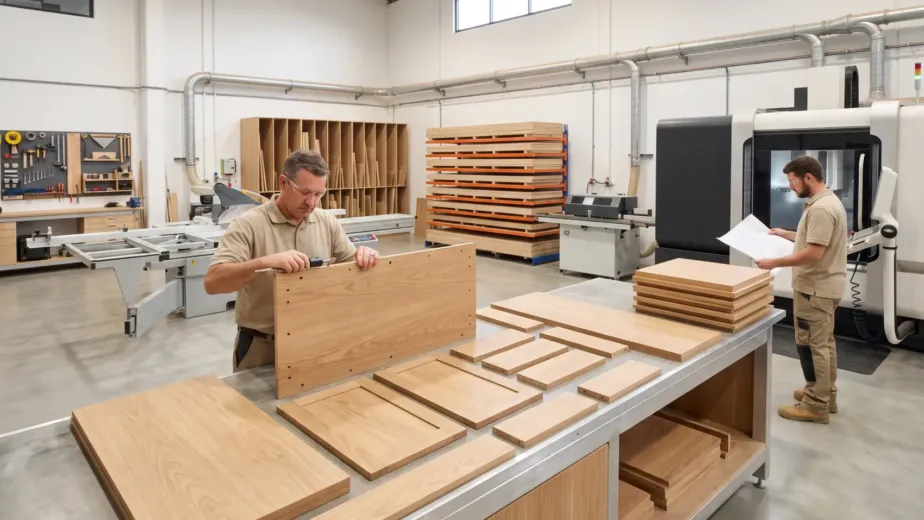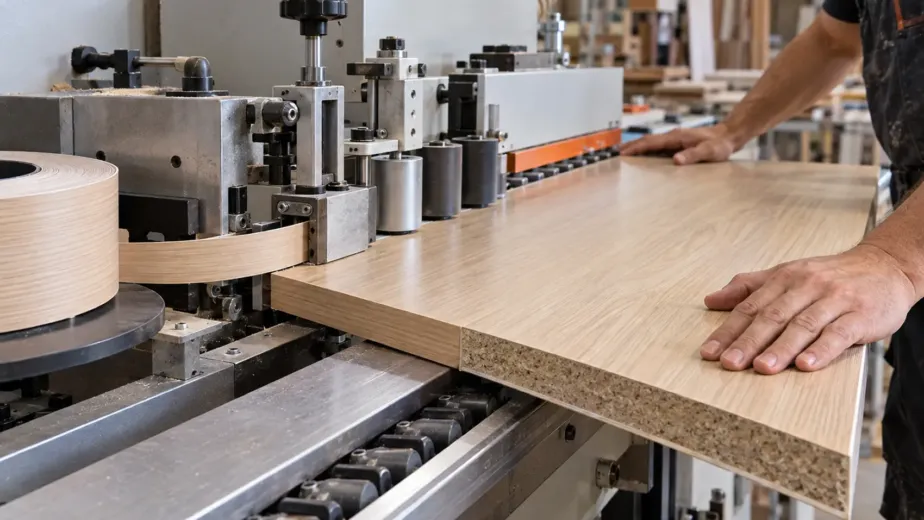
A stack of accurately cut cabinet panels can still bring an installation to a halt.
The cabinet side may have hinge-plate holes on the wrong face. Two mirrored panels may arrive as identical parts. A drawer runner may not match the nominated drilling pattern. Shelf holes may begin at the wrong height, or a service cut-out may conflict with the cabinet hardware.
The CNC machine may have followed every instruction correctly. The problem started earlier because the production information was incomplete, outdated or open to interpretation.
When ordering pre-drilled cabinet panels Melbourne trades can assemble efficiently, you need to supply more than panel dimensions. Your CNC supplier must understand the board, finished size, panel orientation, hardware, hole positions, drilling depths, edge treatment and relationship between every component.
This guide explains what Melbourne cabinetmakers, builders and carpenters should prepare before a cut-to-size job enters production.
Pre-Drilled Panels Are Only as Accurate as the Information Supplied
CNC machinery can cut and drill repeated components with a high level of consistency. It cannot decide which hinge you intended to use, identify an unlabelled left-hand panel or know that the client changed the drawer system after approving the first drawing.
Accurate CNC drilling Melbourne projects depend on three elements working together:
- Correct site and cabinet dimensions
- Confirmed hardware and material specifications
- Clear, current manufacturing information
If one element changes, review the complete production package before releasing the order.
A hardware change may alter drilling positions. A change in board thickness can affect connector locations. A revised cabinet width may influence shelves, doors, drawer fronts and internal components. Treat the cabinet as an assembled system rather than a collection of unrelated rectangles.
What Are Pre-Drilled Cabinet Panels?
Pre-drilled cabinet panels are components that receive nominated machining before they leave the workshop. Depending on the approved order and available service, CNC preparation may include:
- Hinge-cup holes
- Hinge-plate fixing holes
- Shelf-pin holes
- Drawer-runner holes
- Cam and dowel connections
- Conformant or assembly fixing points
- Cabinet connector holes
- Back-panel grooves
- Recesses or rebates
- Handle holes
- Cable and service openings
- Ventilation cut-outs
- Component labels or identification
These operations can reduce manual measuring and drilling during assembly. They can also improve consistency across repeated cabinets when the supplier receives accurate production data.
Pre-drilled panels do not remove the need for careful design, checking or installation. They transfer more decisions to the pre-production stage, where a small documentation error can affect every repeated component.
When Do Pre-Drilled Components Make Sense?
Pre-machined panels can support a wide range of residential and commercial projects, including:
- Kitchens
- Wardrobes
- Vanities
- Laundry cabinetry
- Office storage
- Retail fixtures
- Apartment developments
- Townhouse projects
- Builder packages
- Repeated cabinet modules
- Workshop production overflow
A cabinetmaker may use CNC cabinet components Melbourne services when internal capacity is limited, a project requires repeated parts or an order needs coordinated cutting, edging and drilling.
Builders and carpenters may order prepared components when they have complete cabinet drawings and the experience required to assemble and install the cabinetry. However, they must clearly understand which design, checking, assembly and installation responsibilities remain with them.
Begin with the Finished Cabinet, Not the Individual Hole
Before specifying drilling positions, confirm how the complete cabinet will work.
Review the cabinet’s:
- Overall width, height and depth
- Board thickness
- Door and drawer configuration
- Internal shelf positions
- Back-panel construction
- Hardware system
- Fixing method
- Adjacent cabinets
- Wall and floor conditions
- Appliance requirements
- Service penetrations
- Assembly sequence
- Installation access
A drilling schedule makes little sense without this context. For example, changing an internal drawer height may affect runner positions, drawer-front alignment, shelf locations and usable storage.
The CNC supplier needs manufacturing-ready information, not only a visual concept.
Confirm the Board Before Setting the Drilling
The nominated material affects the finished component and may influence drilling or assembly details.
Before submitting an order for CNC cabinet cutting Melbourne, specify:
- Board manufacturer
- Product range
- Colour or décor name
- Product code
- Board thickness
- Surface finish
- Grain or pattern direction
- Visible face
- Edge-banding requirements
- Whether the client or supplier
- provides the material
Do not write only “white melamine,” “black board” or “timber-look panel.” Many product ranges contain similar colours with different textures, thicknesses and product codes.
If the board specification changes, review the drilling information before production. Never assume a replacement material will behave exactly like the original selection.
Hardware Must Be Confirmed Before Drilling Begins
Hardware names such as “soft-close hinge” or “drawer runner” do not provide enough information for production.
Different brands, product families and models can require different drilling patterns. Even products from the same manufacturer may use different hole positions, mounting plates, clearances or installation methods.
For every hardware item, provide:
- Manufacturer
- Product range
- Model or product code
- Size or length
- Left-hand or right-hand orientation
- where applicable
- Overlay or inset requirement
- Mounting plate
- Installation drawing
- Drilling template
- Relevant adjustment or clearance information
Do not ask the supplier to “use standard drilling” unless both parties have agreed on the exact standard and hardware system.
Hinges
For cabinet doors, confirm:
- Hinge manufacturer and product code
- Hinge type
- Door overlay or inset arrangement
- Hinge-cup diameter and depth
- Distance from the door edge
- Top and bottom hinge positions
- Additional hinge positions
- Mounting-plate type
- Mounting-plate fixing pattern
- Door thickness
- Door material
- Opening-angle or clearance requirements
- Whether adjacent drawers, walls or panels affect the door movement
The number and position of hinges depend on the door’s height, width, weight, material and nominated hardware. Do not copy a previous hinge arrangement without checking the current door.
Drawer Runners
Drawer systems require more than a runner length.
Provide:
- Manufacturer and range
- Exact runner model
- Nominal runner length
- Drawer type
- Cabinet internal width
- Required clearances
- Runner fixing pattern
- Front-fixing details
- Drawer-bottom specification
- Back-fixing details
- Internal drawer configuration
- Load requirement where relevant
If you change the drawer system after drilling approval, the existing holes may no longer suit the hardware.
Shelf Supports
For adjustable shelves, specify:
- Shelf-pin diameter
- Hole depth
- Hole spacing
- Distance from the cabinet front
- Distance from the cabinet back
- Starting height
- Ending height
- Whether drilling applies to both cabinet sides
- Whether holes are continuous or limited to selected zones
Do not automatically drill an entire cabinet side if the design only needs adjustment within a smaller range. Unnecessary holes can affect appearance and increase machining.
Cabinet Connectors
When panels use cams, dowels, confirmat screws or another assembly system, provide the nominated connector and its drilling requirements.
The manufacturing information should show:
- Connector type
- Product code
- Hole diameter
- Hole depth
- Distance from the edge
- Panel relationship
- Face drilling
- Edge drilling
- Number of connectors
- Assembly direction
- Any visible-fixing restrictions
The connector layout must work with shelves, backs, drawers, hinges and other cabinet components.
Panel Orientation Prevents Expensive Mistakes
A rectangular panel may look identical when viewed as a simple cutting-list item. Once drilling, edging and grain direction are added, every face and edge matters.
The production information should identify:
- Front edge
- Back edge
- Top
- Bottom
- Left side
- Right side
- Visible face
- Internal face
- Grain direction
- Edged sides
- Drilled face
- Mirrored version
Use a consistent orientation system across the drawings, cutting list and CNC files.
A note such as “drill left side” can become unclear if the drawing does not explain whether “left” refers to the person viewing the cabinet, standing inside it or looking at the panel face.
A small orientation diagram can prevent a large production error.
Left-Hand and Right-Hand Components
Mirrored cabinet parts deserve separate names and part numbers.
Do not use one panel code for both sides and add “mirror as required” unless your supplier has confirmed that method. It creates unnecessary interpretation during production.
A clearer schedule might identify:
- Base Cabinet 01 – Left Side
- Base Cabinet 01 – Right Side
- Tall Cabinet 03 – Left Gable
- Tall Cabinet 03 – Right Gable
Each item should show its own drilling face, edge treatment and grain direction.
This becomes particularly important for:
- Hinges
- Drawer runners
- Connector holes
- Shelf pins
- Back-panel grooves
- Appliance fixings
- Cable openings
- Service cut-outs
Finished Dimensions or Raw Panel Dimensions?
State whether the cutting list shows finished component sizes or raw board sizes.
Edge banding can affect the final panel dimension, depending on the production method and specification. If the cutting list mixes finished and raw dimensions, the manufacturer may produce parts that do not align with the cabinet design.
Choose one convention and apply it across the project.
For example:
All dimensions shown are finished sizes after edge banding unless specifically noted.
The drawings, cutting list and CNC data should use the same dimension system.
Drilling Positions Need a Clear Reference Point
Every hole position requires a reference. A dimension without a clearly defined starting edge can be interpreted incorrectly.
Your drawing should show whether the measurement starts from the:
- Front edge
- Back edge
- Top
- Bottom
- Finished edge
- Raw board edge
- Centreline
- Visible face
- Internal face
Reference edges must remain consistent. If one drawing measures drawer runners from the cabinet bottom and another measures from the top, make the difference unmistakable.
The specification should also identify:
- Hole diameter
- Hole depth
- Through-hole or blind-hole requirement
- Number of holes
- Spacing
- Face or edge drilling
- Tolerance where required
- Relationship to adjacent machining
A complete cabinet hardware drilling Melbourne order should allow the production team to trace every hole back to a confirmed component or hardware requirement.
Blind Holes and Through-Holes Are Not the Same
A blind hole stops within the panel. A through-hole passes completely through it.
Confusing them can damage the visible face or make a component unusable. Every drilling call-out should state:
- Hole diameter
- Drilling depth
- Whether it passes through the panel
- Which face receives the drilling
- Whether a cap, fixing or connector remains visible
Do not rely on colour coding alone. Printed drawings, converted files or monochrome copies may remove the distinction.
Coordinate Drilling with Edge Banding
Cutting, edging and drilling form one production sequence. The information for each process must agree.
Check that:
- The drilled face matches the panel orientation
- The front edge matches the cabinet design
- Edge thickness does not change the required finished dimension
- Hardware positions reference the correct finished edge
- Grain direction matches the visible orientation
- Door and drawer-front drilling suits the nominated edge treatment
- On-site scribes remain free from machining that may later be removed
For example, a filler panel that requires site scribing should not receive critical drilling too close to the adjustable edge.
Grooves, Rebates and Back-Panel Details
Cabinet backs influence strength, squareness, service access and assembly.
If the CNC supplier will machine grooves or rebates for the back panel, specify:
- Back-panel material
- Back-panel thickness
- Groove width
- Groove depth
- Distance from the rear edge
- Whether the groove continues through the top or bottom
- Whether the back is inset, planted or housed
- Access requirements for services
- Assembly method
Confirm that the groove does not conflict with connector drilling, hinge plates, drawer runners or service holes.
Appliance Cabinets Need Model-Specific Information
Never design or drill an appliance cabinet using only an advertised appliance width.
Provide the manufacturer’s current installation documentation for:
- Ovens
- Microwaves
- Dishwashers
- Refrigerators
- Wine refrigerators
- Rangehoods
- Coffee machines
- Steam ovens
- Warming drawers
- Laundry appliances incorporated into cabinetry
The cabinet information should account for:
- Actual product dimensions
- Required opening size
- Ventilation
- Door movement
- Fixing points
- Power, water, gas or waste connections
- Service access
- Adjacent drawer and door clearances
- Manufacturer-required support
If the appliance model changes, recheck the cabinet before releasing updated CNC cabinet components Melbourne orders.
Service Holes and Cable Openings
A service opening should have a clear purpose and a verified position.
Identify:
- Opening diameter or dimensions
- Position from confirmed reference edges
- Face or panel receiving the opening
- Cable, pipe, duct or fitting passing through
- Required clearance
- Edge treatment where applicable
- Relationship to shelves, drawers and hardware
- Whether the opening remains visible
Do not position service holes using approximate site photos. Confirm services through verified drawings, site measurements or coordination with the relevant trade.
Licensed trades remain responsible for their regulated work. CNC machining should follow the coordinated cabinet and service information.
Labelling Makes Assembly Faster
Clear panel labels help installers connect manufactured components to the correct cabinet.
A useful labelling system can include:
- Project name
- Room
- Cabinet number
- Component name
- Left or right orientation
- Part number
- Drawing revision
- Material code
- Quantity
For example:
Project A – Kitchen – Base Cabinet 04 – Left Side – Revision C
Avoid generic labels such as “side panel” when the order contains dozens of side panels with different drilling.
The cabinet list, panel labels and installation drawings should use the same terminology.
What Files Should You Send?
Before sending files, confirm which formats your CNC supplier accepts. Do not assume every workshop uses the same software or production workflow.
A typical submission may include:
- PDF cabinet drawings
- Cutting list
- Panel schedule
- Hardware schedule
- Material schedule
- Edge-banding schedule
- CNC-ready files where accepted
- Appliance specifications
- Hardware drilling templates
- Revision register
- Installation plans
- Relevant project notes
The drawings should remain readable when printed. Small annotations, overlapping dimensions and unclear screenshots create unnecessary risk.
CAD and CNC Files
Where your supplier accepts CAD or CNC data, confirm:
- Required file format
- Units of measurement
- Drawing scale
- Layer naming
- Origin point
- Panel orientation
- Machining face
- Tooling assumptions
- Whether arcs and curves use compatible geometry
- Whether the file includes finished or raw dimensions
Do not send a file exported from unfamiliar software without checking it. Open the exported version separately and confirm that dimensions, geometry and layers remain correct.
PDF Drawings
PDFs help communicate design intent, cabinet relationships and dimensions, but they may not replace CNC-ready production data.
Use PDFs to show:
- Cabinet elevations
- Sections
- Component relationships
- Part numbers
- Hardware positions
- Edge details
- Assembly notes
- Site context
Ensure the PDF revision matches the cutting list and digital production files.
Revision Control Is Essential
One outdated file can affect an entire batch of components.
- Project name
- Drawing number
- Revision number
- Revision date
- Author or checker
- Approval status
- Description of changes
When issuing a revision:
- Replace superseded documents
- Clearly identify changed components
- Update the cutting list
- Update the hardware schedule
- Update the CNC data
- Confirm whether production has started
- Record who approved the change
Do not send a revised drawing in one email and assume it automatically replaces every earlier file. Confirm the current production package in writing.
Use a Sample Cabinet for Repeated Projects
When a project includes many identical or similar cabinets, consider checking a sample or first-off unit before releasing the full batch.
A sample can help verify:
- Panel dimensions
- Assembly method
- Connector fit
- Hinge drilling
- Door alignment
- Drawer-runner positions
- Shelf drilling
- Edge treatment
- Back-panel fit
- Component labels
- Installation sequence
A successful sample does not remove the need to check the remaining production data, but it may reveal a repeated issue before it affects the complete order.
Common Problems That Delay CNC Production
Hardware Has Not Been Selected
The supplier cannot confidently drill for a generic hinge, runner or connector. Confirm product codes and provide the manufacturer’s information.
The Cutting List and Drawings Disagree
If the drawings show one cabinet width and the cutting list shows another, production should pause until the discrepancy is resolved.
Panels Have No Clear Orientation
Drilling may appear on the wrong face or edge when the information does not identify the front, back, top, bottom and visible side.
Mirrored Parts Share One Unclear Code
Left-hand and right-hand components should receive clear, separate identification.
Hole Depths Are Missing
A diameter alone does not state whether the machine should create a shallow recess, blind fixing hole or through-hole.
Edge Banding Changes but Dimensions Do Not
Review finished sizes when the edge specification changes.
An Appliance Model Changes Late
A replacement appliance may require different openings, ventilation and fixing details.
Several File Revisions Remain in Circulation
Remove superseded documents and issue one coordinated production package.
Site Measurements Are Still Preliminary
Do not release manufacturing based on measurements that still require verification.
The Order Assumes the Supplier Will Complete the Design
A cut-to-size provider manufactures from approved information. Clarify whether design development, checking or shop drawings form part of the agreed service.
A Production-Ready Cabinet Panel Schedule
The following example shows the type of information that can support a clear order. Adapt it to the supplier’s required format.
| Field | Information to provide |
|---|---|
| Project | Project name and Melbourne location |
| Cabinet | Unique cabinet number |
| Component | Left side, right side, top, bottom, shelf or back |
| Quantity | Number of identical parts |
| Finished size | Length, width and thickness |
| Material | Manufacturer, range and product code |
| Grain | Direction and continuity requirements |
| Visible face | Face A or Face B |
| Edging | Edge product and sides requiring treatment |
| Hardware | Manufacturer and exact product code |
| Face drilling | Diameter, depth and coordinates |
| Edge drilling | Diameter, depth and coordinates |
| Grooves | Width, depth, position and purpose |
| Cut-outs | Size, position and function |
| Label | Required component identification |
| Revision | Current drawing and file revision |
Do not use this table as a substitute for coordinated drawings. It works best as part of a complete manufacturing package.
Pre-Production Checklist
Before approving your CNC drilling Melbourne order, confirm that you have:
- Verified the final site dimensions
- Approved the cabinet layout
- Confirmed every panel’s finished size
- Specified the board manufacturer and product code
- Confirmed board thickness
- Identified grain direction
- Marked every visible face
- Specified edge-banding requirements
- Confirmed exact hardware product codes
- Attached hardware drilling information
- Identified left-hand and right-hand components
- Added hole diameters and depths
- Marked blind holes and through-holes
- Defined all drilling reference edges
- Checked hinge and mounting-plate positions
- Checked drawer-runner positions
- Checked shelf-pin zones
- Coordinated grooves and rebates
- Verified appliance specifications
- Confirmed service-hole positions
- Used consistent component names
- Added cabinet and part labels
- Updated all files to the same revision
- Removed superseded documents
- Confirmed the required file format
- Reviewed collection or delivery requirements
- Approved the complete production package
Ordering Pre-Drilled Cabinet Panels from Sagar Cabinets
Sagar Cabinets supplies cut-to-size and flat-pack joinery components for Melbourne cabinetmakers, builders, carpenters and experienced trade clients.
Depending on the confirmed project scope, the service can include panel cutting, edge banding, material supply and precision machining based on approved production information. Preparing complete drawings, cutting lists, hardware schedules and drilling details helps the team assess the job before manufacturing begins.
Sagar Cabinets operates from Dandenong South and supports residential and commercial joinery projects across Melbourne. Available materials, machining services, file requirements and production details should be confirmed for each order.
Clear Information Creates Assembly-Ready Components
Pre-drilled panels can save valuable workshop and site time, but only when the drilling matches the cabinet, hardware and assembly method.
Before submitting your order, check the panel orientation, hardware codes, hole positions, drilling depths, edge specifications and file revisions. If those details agree, CNC cabinet cutting Melbourne becomes a structured production process rather than a series of assumptions.
Send Sagar Cabinets your cabinet drawings, cutting list, material schedule, edge details, hardware specifications and drilling requirements to discuss your next Melbourne project.
Frequently Asked Questions
What information is required to order pre-drilled cabinet panels?
- Provide the panel dimensions, board product, thickness, grain direction, visible face, edge requirements, hardware product codes, drilling coordinates, hole diameters, drilling depths and component quantities. Include cabinet drawings, a cutting list and the current document revision.
Can a CNC supplier drill panels for hinges and drawer runners?
- A CNC supplier may machine hinge, mounting-plate and drawer-runner holes when the service is available and the customer provides accurate hardware and drilling information. Confirm the exact hardware product codes and required machining before production.
Do I need to select the hardware before ordering CNC-cut panels?
- Yes. Different hinges, drawer runners and connectors may require different drilling patterns. Select the hardware and confirm the manufacturer’s specifications before releasing the panels for machining.
What is the difference between a blind hole and a through-hole?
- A blind hole stops within the panel, while a through-hole passes completely through it. The drilling schedule should identify the hole diameter, depth, face and whether the hole must pass through the board.
How should I show left-hand and right-hand cabinet panels?
- Give mirrored panels separate part names or codes. Show the visible face, front edge, grain direction, edging and drilling face for each component so the supplier does not need to interpret the orientation.
Can I send a PDF drawing for CNC cabinet cutting?
- A PDF can communicate dimensions, cabinet relationships and design intent, but it may not provide production-ready CNC data. Ask the supplier which file formats and schedules they require before submitting the order.
Should panel measurements include edge banding?
- State whether the dimensions represent finished panel sizes or raw board sizes. Use the same method across the cutting list, drawings and digital files to prevent size discrepancies.
Can pre-drilled cabinet panels arrive ready for assembly?
- Panels may arrive cut, edged, drilled and labelled when those services form part of the approved order. Confirm the connectors, hardware machining, back-panel details, packaging and assembly responsibilities before production begins.
Who is responsible for checking the cabinet design?
- Responsibilities depend on the agreed project scope. A cut-to-size supplier may manufacture from customer-approved information rather than redesigning or independently verifying the cabinetry. Confirm design, checking and approval responsibilities before submitting the order.
What causes the most common CNC drilling errors?
- Common causes include unconfirmed hardware, unclear panel orientation, missing hole depths, outdated drawings, conflicting dimensions, unlabelled mirrored parts and late changes to appliances or materials.